Getting Started with TraceFab
Follow these steps to download TraceFab, activate your free Pro license and import your first PCB.
1. Download TraceFab
TraceFab is available for 64-bit Windows 10 and Windows 11. Both packages contain the same application, including the required runtime files.
Windows Installer
Recommended for most users. Includes a normal setup wizard, desktop shortcut and uninstaller.
Download Windows InstallerPortable ZIP
No installation is required. Extract the complete ZIP package before starting TraceFab.
Download Portable ZIP2. Install or extract the application
Using the installer
- Close TraceFab if an older version is already running.
- Open the downloaded setup file.
- Accept the license agreement and follow the setup wizard.
- Keep the default installation folder unless you have a reason to change it.
- Complete the installation and launch TraceFab.
Using the portable package
- Extract the complete ZIP archive into a dedicated folder.
- Keep all extracted files and folders together.
- Start TraceFab.exe from the extracted folder.
3. Check the main workspace
TraceFab opens in its main PCB workspace. The interface keeps the project controls, CAM tools, messages and graphical PCB preview together in one window.
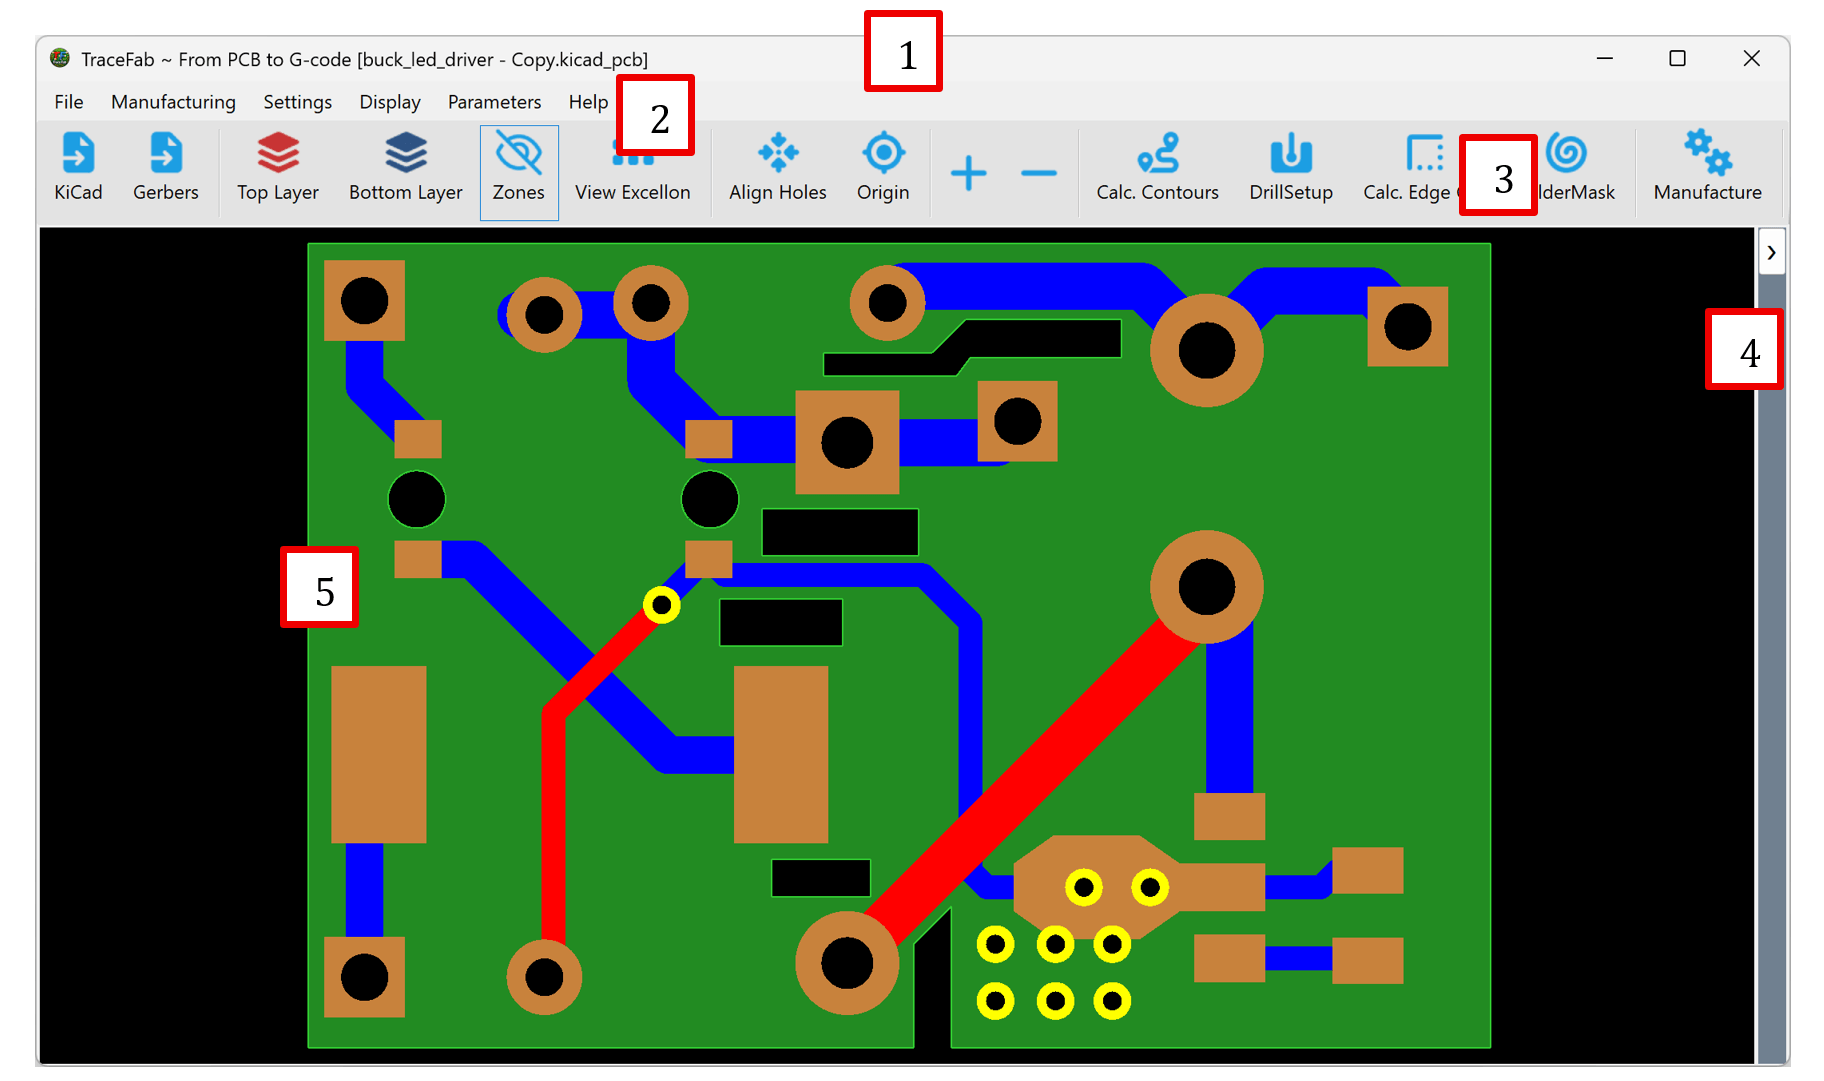
- Title bar: shows TraceFab and the currently imported PCB file.
- Menu bar: provides file, manufacturing, settings, display, parameter and help commands.
- Main toolbar: contains the import and CAM actions used during the PCB workflow.
- News and messages: displays release information, updates and license messages.
- PCB viewport: shows the imported copper, drills, board outline and calculated geometry.
4. Activate your free Pro license
During the beta period you can claim a free perpetual Pro license for the computer running TraceFab.
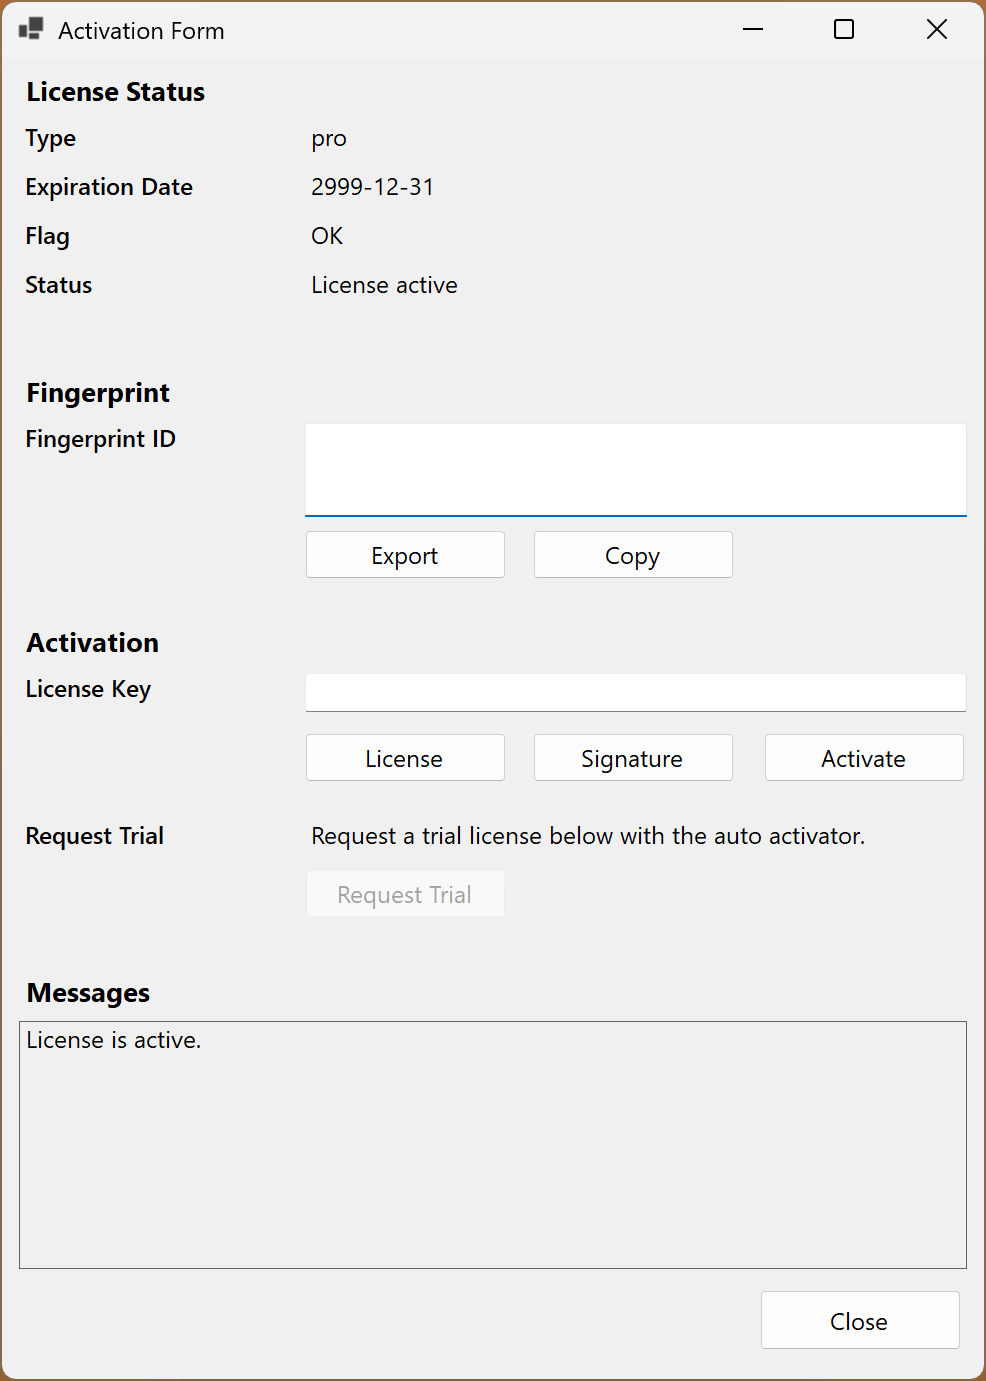
- In TraceFab, open Help > Activation.
- Select Copy beneath the Fingerprint ID.
- Open the free Pro license page using the button below.
- Complete the form and paste the fingerprint exactly as copied.
- Download both TraceFab.license and TraceFab.signature.
- Return to Help > Activation and select the matching License and Signature files.
- Select Activate and confirm that the status reports License active.
- Restart the software, to see the activation have effect.
5. Import your first PCB
Choose the import method that matches your source files:
KiCad project
- Select KiCad on the main toolbar.
- Choose the required .kicad_pcb file.
- Wait for TraceFab to parse and display the board.
Gerber and Excellon files
- Select Gerbers on the main toolbar.
- Assign the available front copper, back copper, Excellon drill and edge-cut files.
- Check that the detected units, coordinate format and file statuses are correct.
- Select Import / Let's Go! when the required files report that they are ready.